How to Wax a Snowboard: The Complete Beginner’s Guide
When I was a beginner, I thought waxing a snowboard was pointless. My logic was simple: as long as the board got me down the mountain, what was the big deal? As it turns out, it’s actually a very big deal.
A well-waxed snowboard glides much more smoothly, making riding easier, faster, and more controlled. I noticed the biggest difference on flat sections and in sticky snow — two situations where an unwaxed board really slows you down.
Wax also protects your base. Without it, the base dries out and wears down faster over time. Regular waxing keeps it in good condition and helps your board last longer.
Waxing is not as hard as you think! In this guide, we’ll cover the tools you need and why you need them, how to set up your workspace, and step-by-step instructions on how to wax your snowboard.
Essential Tools and Why You Need Them
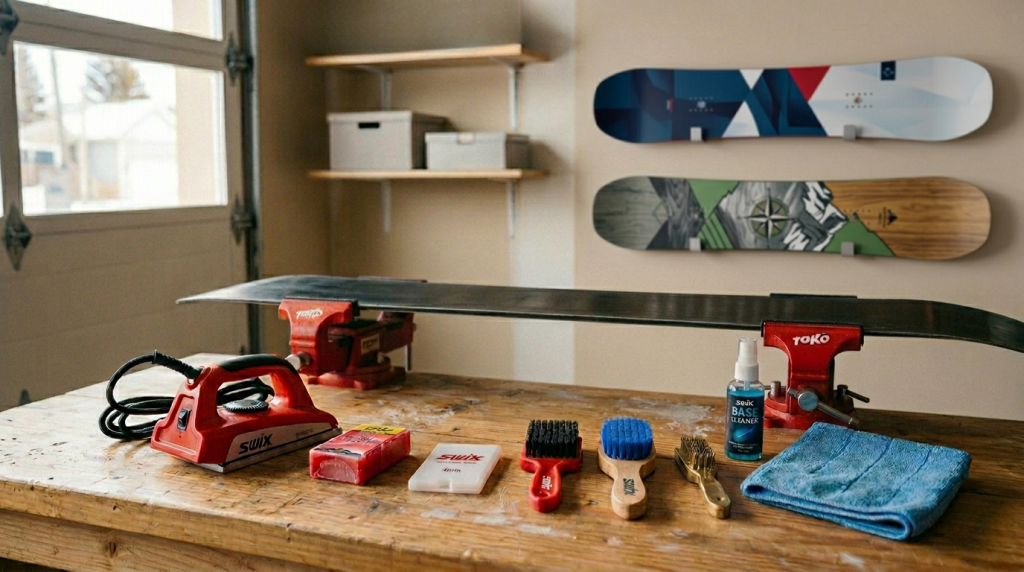
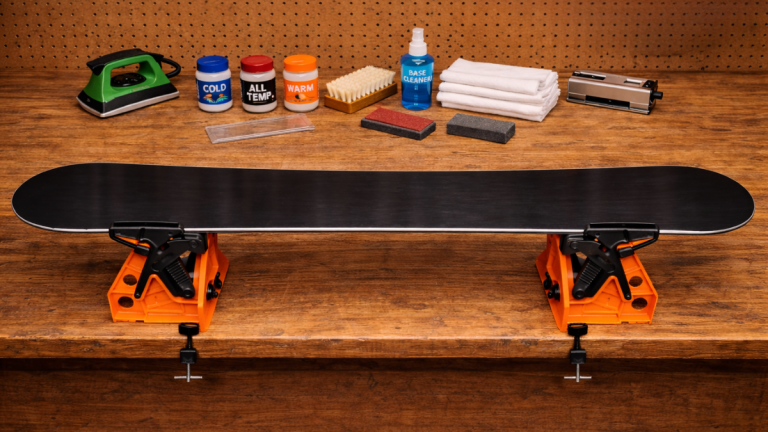
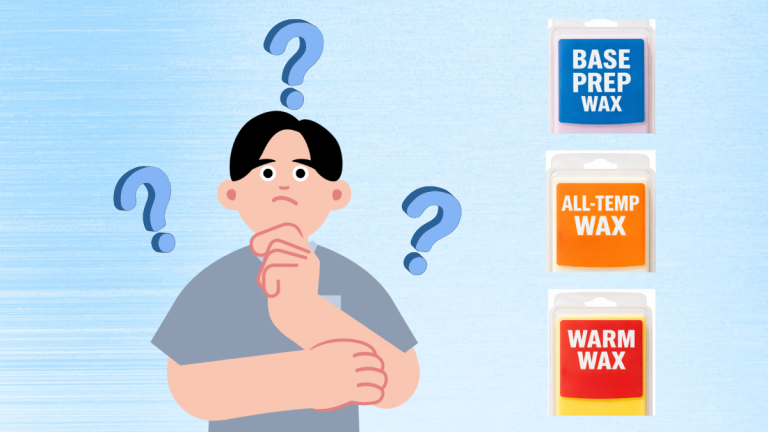
- All Temperature Wax
There are several types of snowboard wax, including cold/warm/all temperature wax. For beginners, I recommend all temp wax because it works well in a wide range of snow conditions. - Waxing Iron
I recommend using a temperature-controlled waxing iron because it lets you set the heat to match the specific wax you are using, which helps the wax melt evenly and soak into the snowboard base properly. This is important because different waxes melt best at different temperatures, and using the correct setting helps prevent overheating.
A regular clothes iron can also work, but it is not ideal. The steam holes can drip water onto the snowboard base, which can affect the wax and possibly damage the board. It also does not heat as evenly as a waxing iron, so the wax may melt unevenly or the base could get too hot. Also, once you use a clothes iron for wax, you should not use it on clothes again because wax can get on your clothing. - Wax Scraper. Why do you need to scrape wax off? Because there’s excess wax sitting on top of the base surface after you apply wax. If you don’t scrape it off, it actually makes you SLOWER.
Caution: use plastic instead of metal scrapers because metal scrapers can damage the base. - Brushes (nylon, brass, and horsehair)
In my opinion, a nylon brush is all you need for a beginner- Brass brush (optional): used to clean the dirt out of the base before waxing. Use light pressure when brushing because it’s possible to damage the base if pressed too hard.
- Nylon brush: Used after the wax scraper to give that extra polish, removing excess wax that scraping missed. Best for warm/universal(all temp) waxes.
- Horsehair brush (optional): Finer polishing than Nylon brush. Best for cold/hard waxes.
- Base cleaner (optional): If you’re board is very dirty, use this before waxing to strip off old wax and dirt so your fresh wax can actually bond properly.
- Workbench and/or vise (optional): Secure your board at a comfortable working height. But anything will work as long as your board is stable and won’t shift around when you are working.
Getting Started: How to Prep Your Board and Space
Find yourself a Good Workspace
The area needs to be well ventilated because wax fumes contain harmful chemicals that could pose respiratory/health risks. A respirator mask is also recommended.
You are gonna drip a little, so don’t wax over nice floor/carpets or get some floor cover. The ideal place is the garage or balcony, but basement works too if it’s well ventilated.
Set up a Stable Workbench
The workbench needs to be stable because you will be applying pressure to the board while waxing, and if your board shifts around or wobbles, the wax job might be uneven.
You can use either snowboard specific vises, or two sawhorses set apart on the floor, or anything really, as long as it props your snowboard up at a comfortable height and it’s stable
Cleaning the Base Thoroughly
- Remove your bindings.
- Place your board face up on the workbench, make sure it’s secure.
- Wipe the base clean with microfiber cloth.
- If base is very dirty, brush it with a brass brush to remove built-up dirt and old wax. Then lightly spray some base cleaner on the base and wipe it clean with a cloth. Do not use too much base cleaner, because too much can dry out the base.
How to Wax a Snowboard: A Step-by-Step Guide
- Step 1: Heat your iron
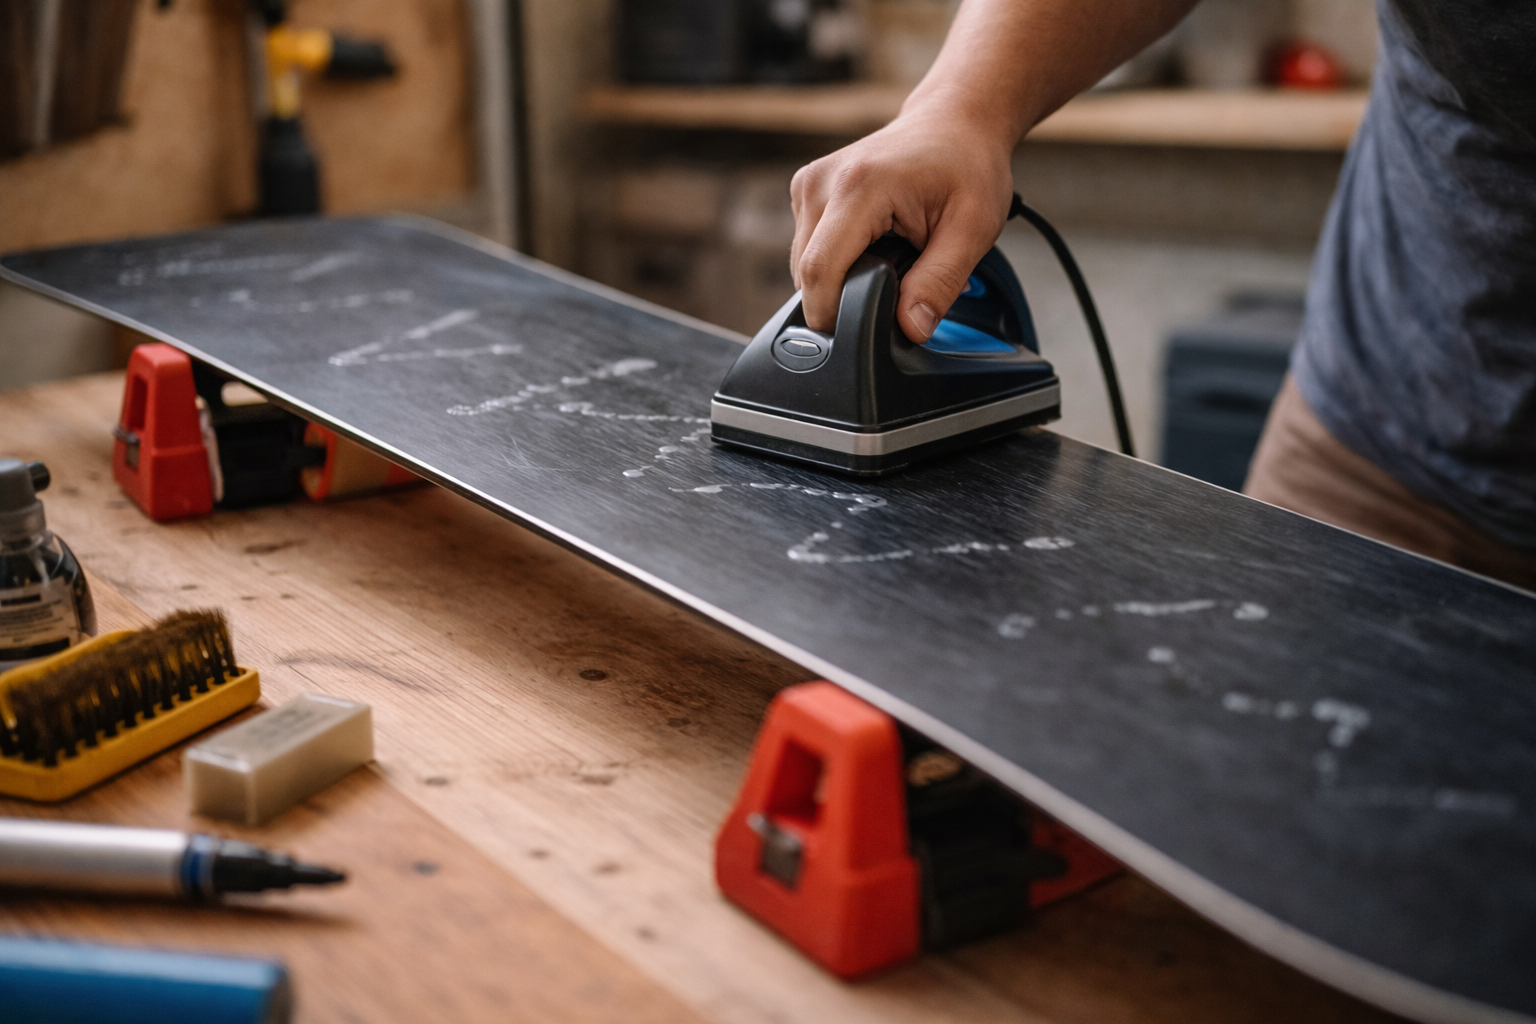
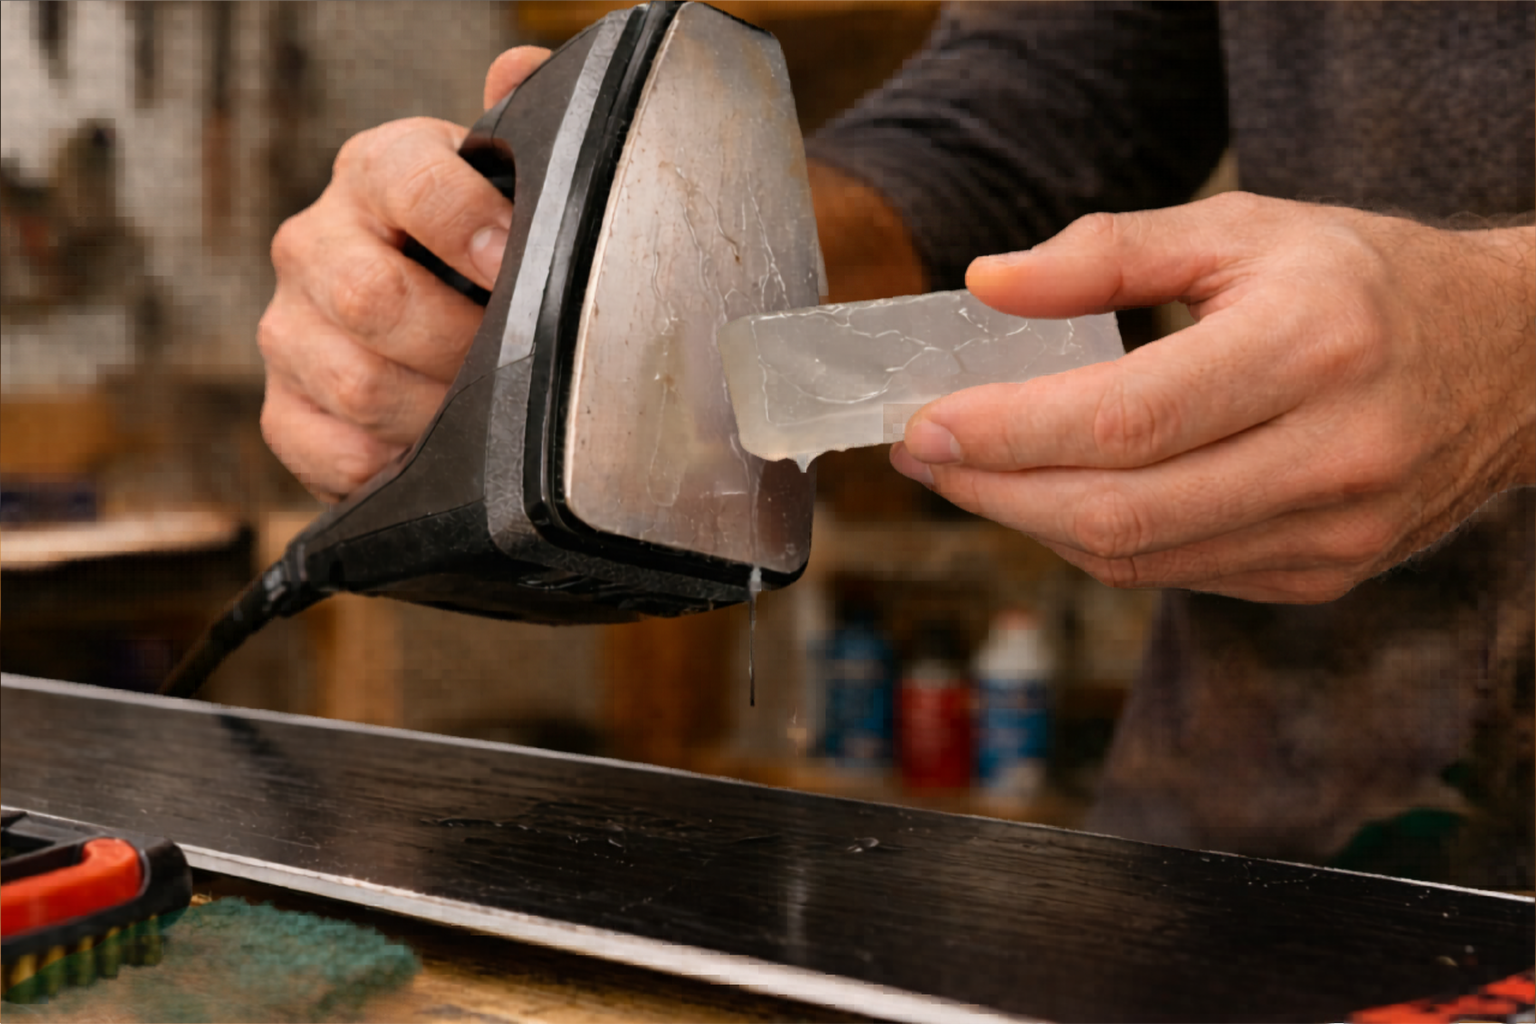
Set to appropriate temperature. The wax temp rating should be specified on the package. - Step 2: Apply wax to iron
Hold the wax bar against the iron and drip the wax evenly over the base in a zigzag pattern from tip to tail.
Add a little extra wax to any areas that look white or faded, since those spots are drier and need more wax.
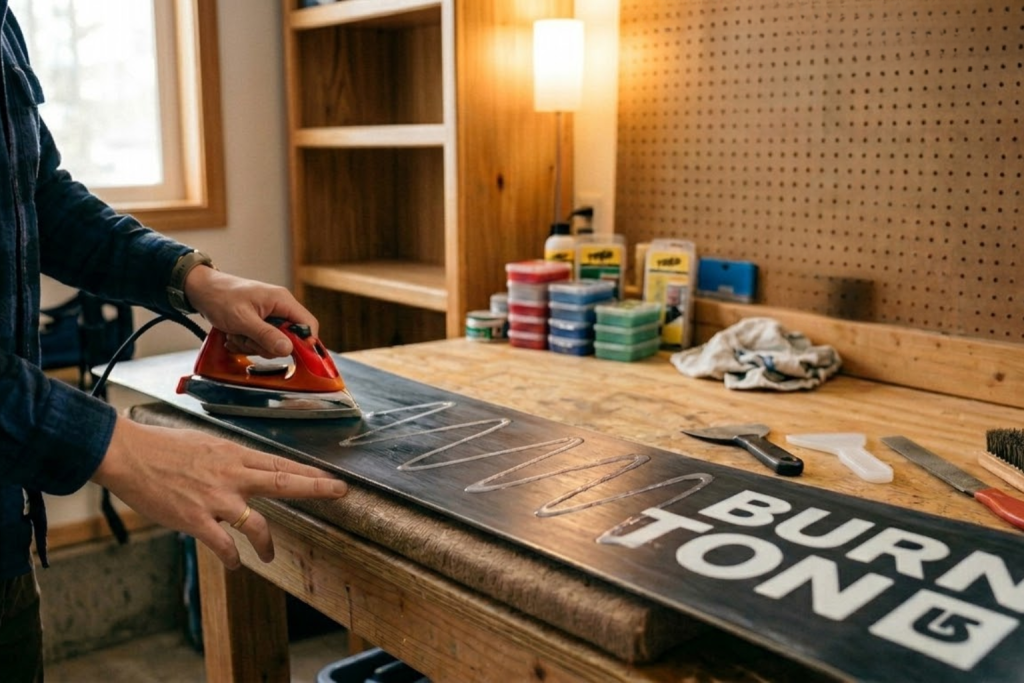
Caution: if it starts smoking, the iron is too hot, turn the temperature down. - Step 3: Spread the wax
Use small circular motions and keep the iron moving the entire time.
Caution: Do not let it sit in one place for too long, because too much heat can damage the base. Moving the iron steadily helps spread the wax evenly. - Step 4: Let it cool completely
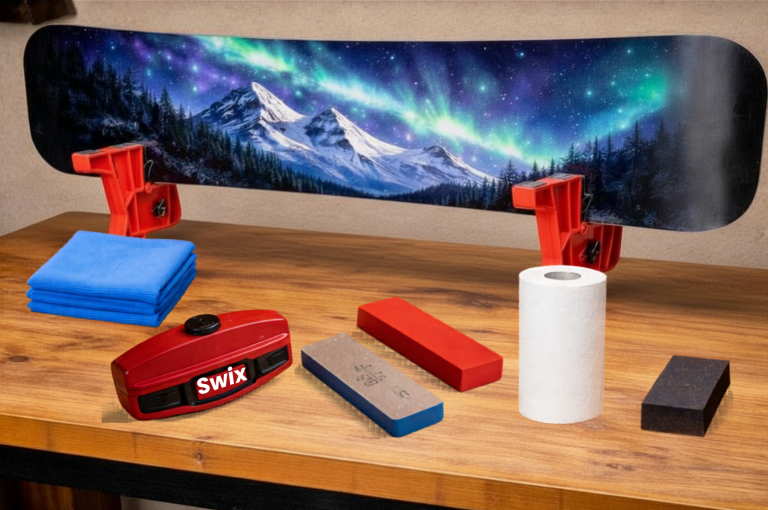
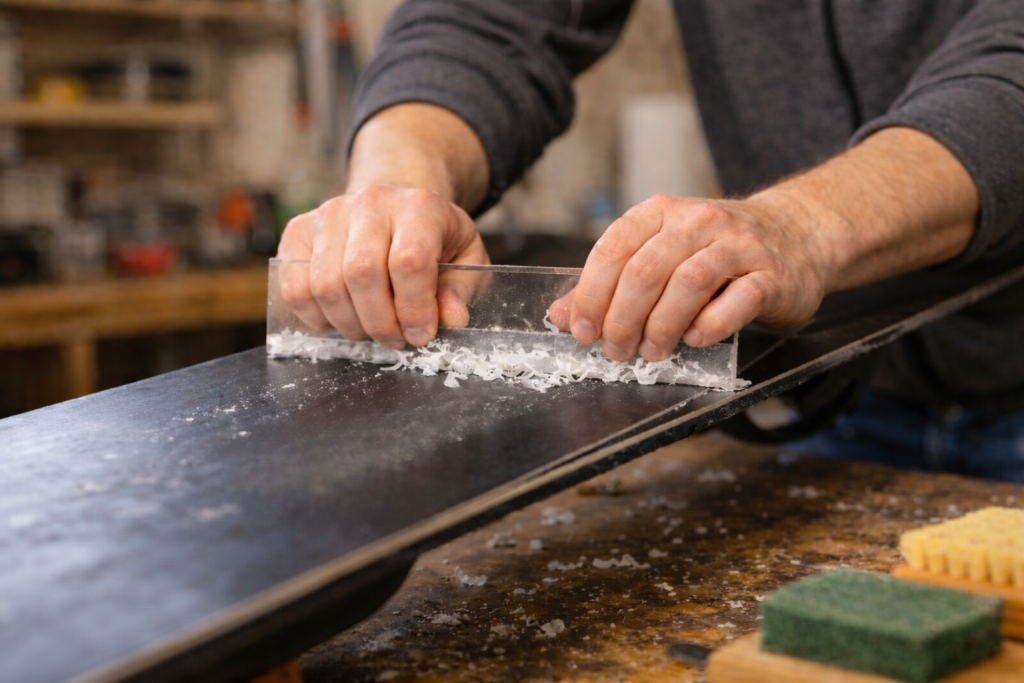
Wait at least 30 minutes - Step 5: Scrape off the excess wax
Hold the scraper at a 45° angle and push it from tip to tail using long, steady strokes.
Press firmly enough to lift off the extra wax, but not so hard that you gouge the base.
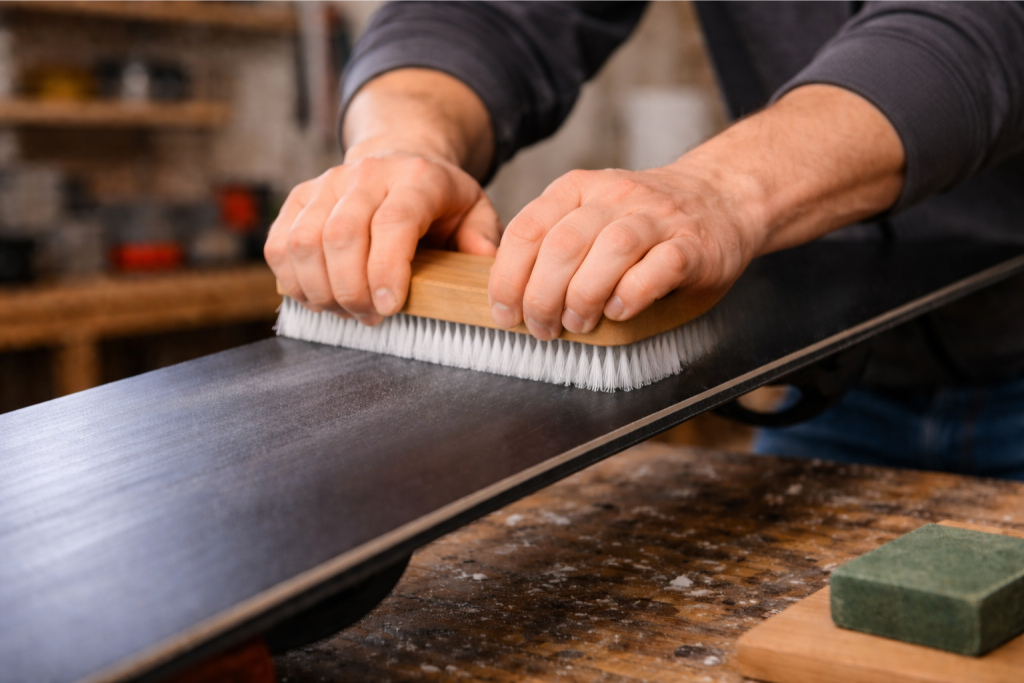
Keep scraping until the base looks smooth and you no longer see thick wax on the surface. - Step 6: Brush the base
brush the base from tip to tail with a nylon brush. This helps remove any leftover wax and makes the board smoother and faster on snow.
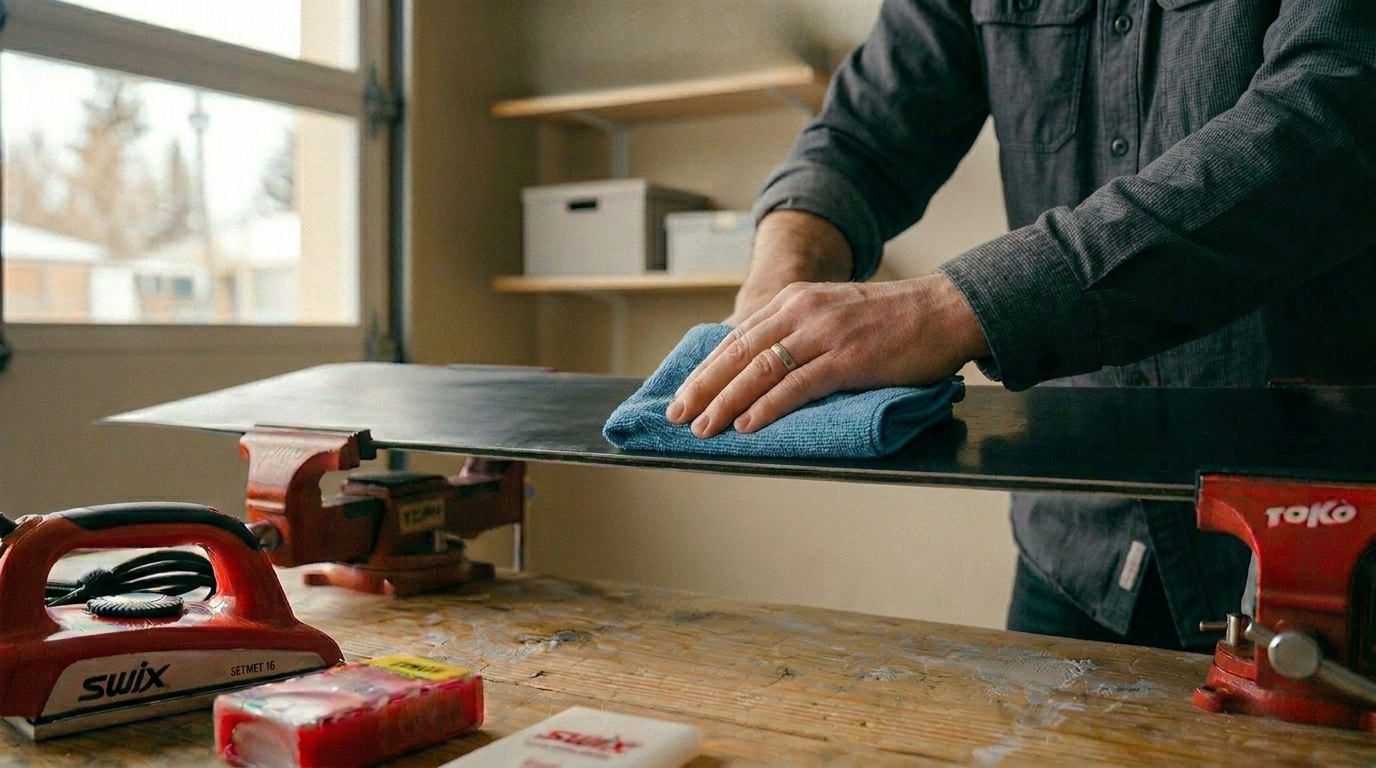
optional: brush again with horsehair brush for a finer polish. - Step 7: Final inspection
Wipe everything clean and dry.
Congrats! You are done!
Ready to Ride: Your New Snowboard Care Routine
Good job! You just waxed your snowboard! I know it could be little intimidating at first, but now you can see it’s really not that complicated. The more you do it, the faster and easier it gets. Once you learn the basic process, it becomes a simple part of regular snowboard care. For a complete guide on snowboard care, check out our DIY Snowboard Maintenance Guide for Beginners.
I’d love to hear from you: Got questions? Spotted something unclear or want to share feedback? Please reach out to me in my contact page!