Summer Snowboard Storage: The Complete Beginner’s Guide
That last ride of the season usually ends with gear being thrown into a sketchy basement and forgotten. But after a winter of ice and slush, your board deserves better than a damp floor. Proper storage is the single most important thing you can do to extend the life of your gear and save serious money on maintenance.
Treat your snowboard with the respect it earned! In this guide, we’ll explore why proper snowboard storage matters, along with the must do tasks to get a head start on your next season.
Why Proper Summer Snowboard Storage Matters
Snowboards are made of layers of wood, fiberglass, plastic, and metal. These materials are sensitive to the world around them. Here is what happens if you skip the off-season maintenance and store it carelessly.
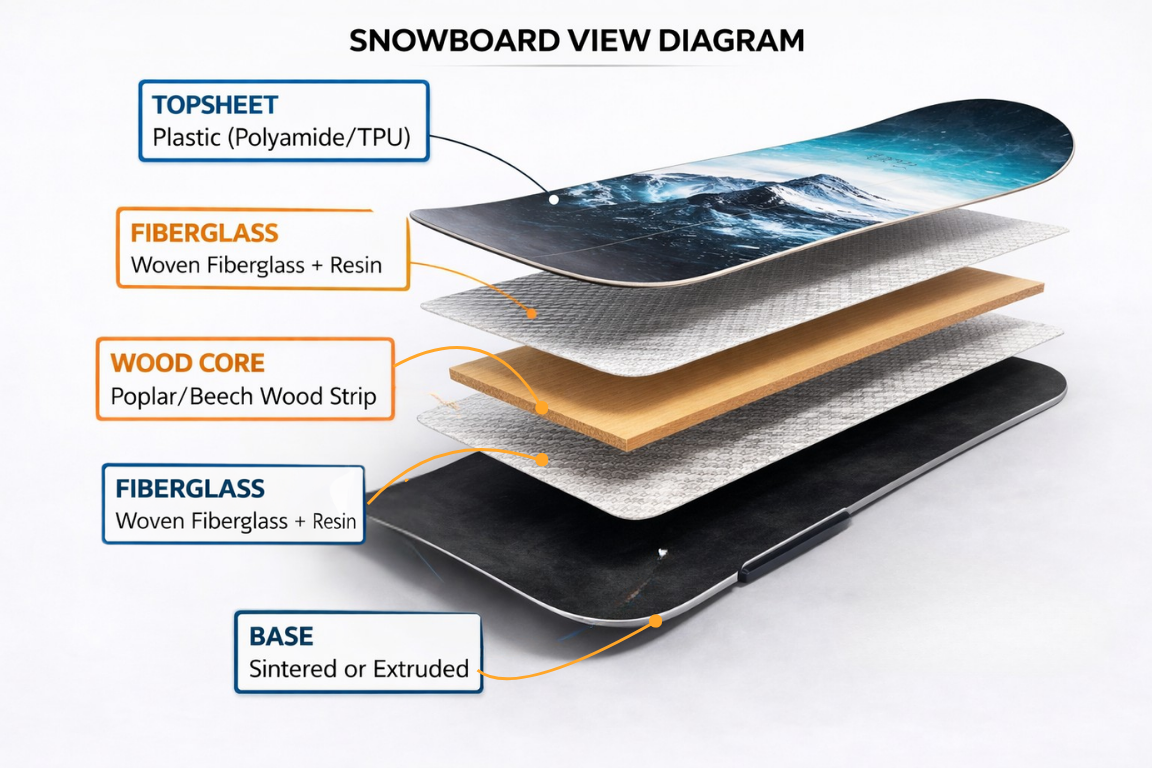
- Base Oxidation
When a snowboard base is left dry, the plastic begins to “oxidize.” You’ll notice white, chalky patches on the base. This makes your board glide slower. If it gets bad enough, the base won’t be able to hold wax anymore, and your board will never be fast again. - Edge Rust
Moisture is a snowboard’s biggest enemy. If you store your board in a damp basement or a humid garage, the steel edges will start to rust. Small surface rust can be cleaned off, but deep rust can eat away at the metal. A dull edge will make the snowboard a lot harder to control in icy conditions - Warping and Delamination
Extreme heat (like in a hot attic) can cause the glue holding your board together to fail. This is called delamination, where the layers of the board actually start to peel apart. Heat can also cause the wood core to warp, changing the shape of your board forever.
What to Do With Snowboard Bindings: On or Off?
Should you remove snowboard bindings for summer storage? The short answer is: you don’t have to, but you must at least loosen the screws.
Tightened mounting screws exert pressure around the inserts. Over a long period of time, this can contribute to base dimples (dents on your snowboard base). So you should always loosen the screws or remove the bindings before off-season storage.
The following are the next steps you should do before storage.
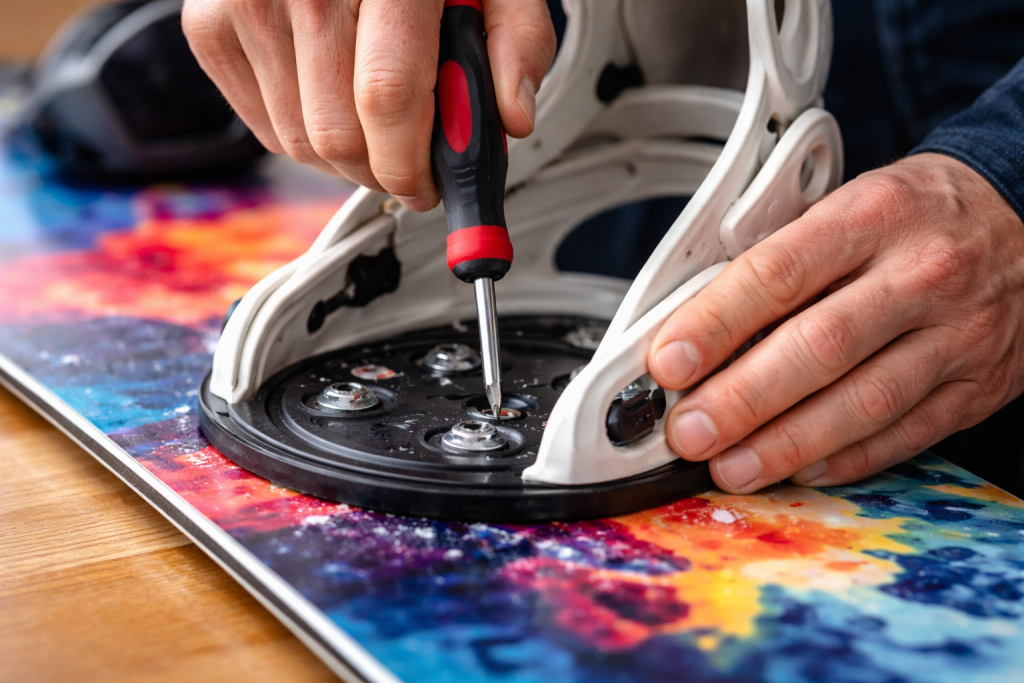
- Loosen or Remove Your Bindings: If not removing the bindings, at least loosen the mounting screws by four turns
- Clean & Dry: Use a damp cloth to remove salt and grime from the bindings.
- Inspect Hardware: Check for cracks, rust, and damaged screws/straps/ratchets.
- Organize Your Hardware: If removing, keep your screws in a labeled bag.
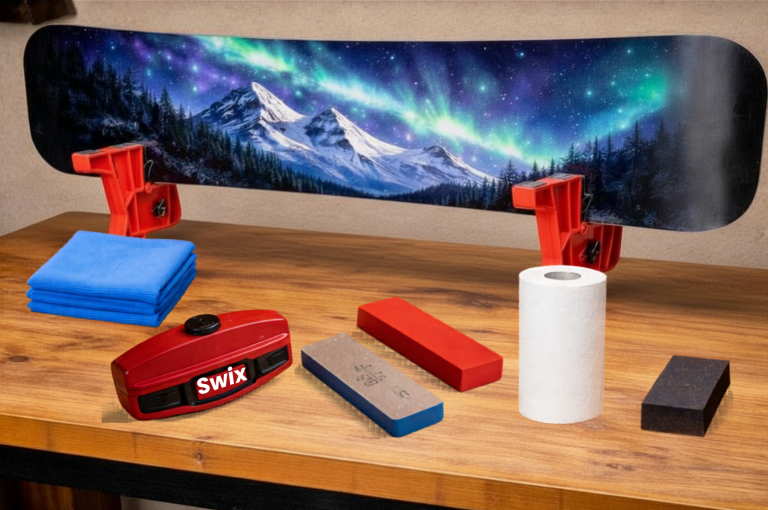
How to Deep Clean Your Snowboard
After a full season of riding, your snowboard base is probably covered in a hidden layer of dirt, grease, and road salt. Even if the snow looked white, these tiny bits of grime can get stuck inside the pores of your board over time.
I always recommend a deep clean before storing your gear for two main reasons:
Dirt traps moisture: this causes base oxidation (that dry, white look on your board).
Better Protection: A clean base lets your summer wax soak in much better.
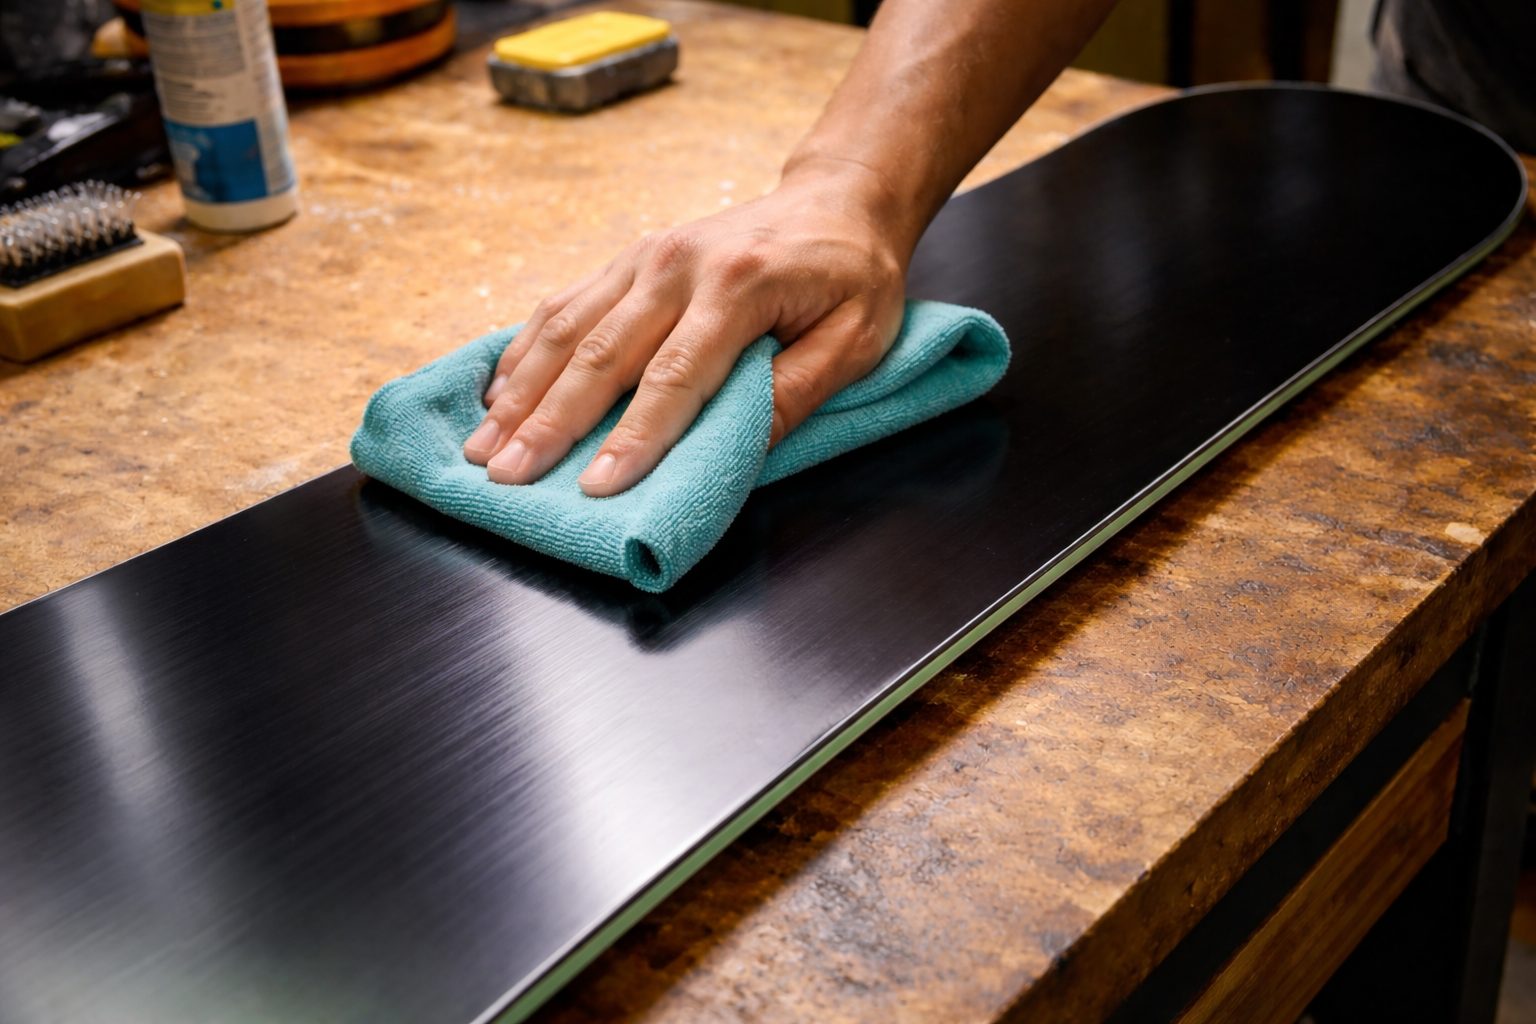
How to deep clean your snowboard step by step
- Clean the Top Sheet: Use a microfiber cloth/paper towel with a little warm water and mild soap for sticky spots. Do not clean the top sheet with harsh chemicals.
- Clean the Snowboard Base: Spray the base with a small amount of bass cleaner then wipe it clean with a cloth.
- (Optional) Scrub the Base with a Brass Brush: For a better removal of dirt and grease.
- Remove Edge Rust : Use a gummy stone to remove small orange/brown spots (edge rust). Move the gummy stone along the edge using short, controlled strokes.
Tip: no need to full tune right now, it can wait until preseason - Wipe Everything Clean: Final wipe to make sure the edge, top sheet and base is dry.
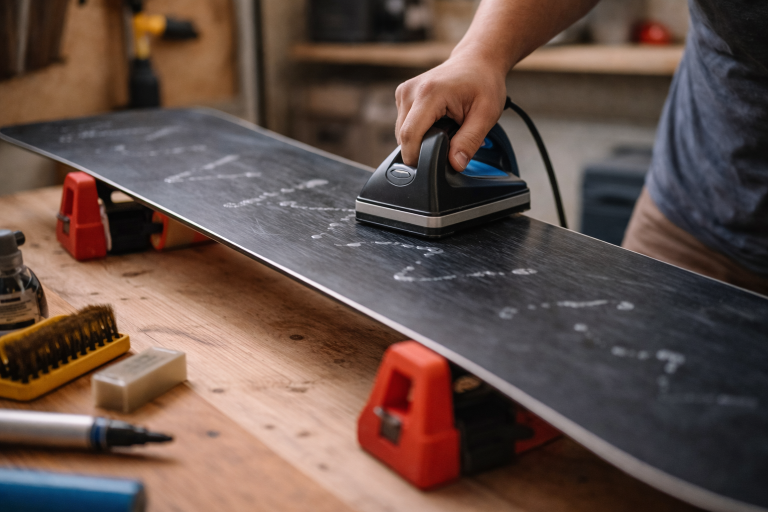
Apply Storage Wax to Protect the Base
Applying storage wax is the most important step to keep your snowboard healthy during the summer. Storage wax is just a thick layer of all-temperature wax that you leave on (don’t scrape) after you iron it in. This wax acts like a protective shield, keeping air and moisture away from the base so it doesn’t dry out or oxidize.
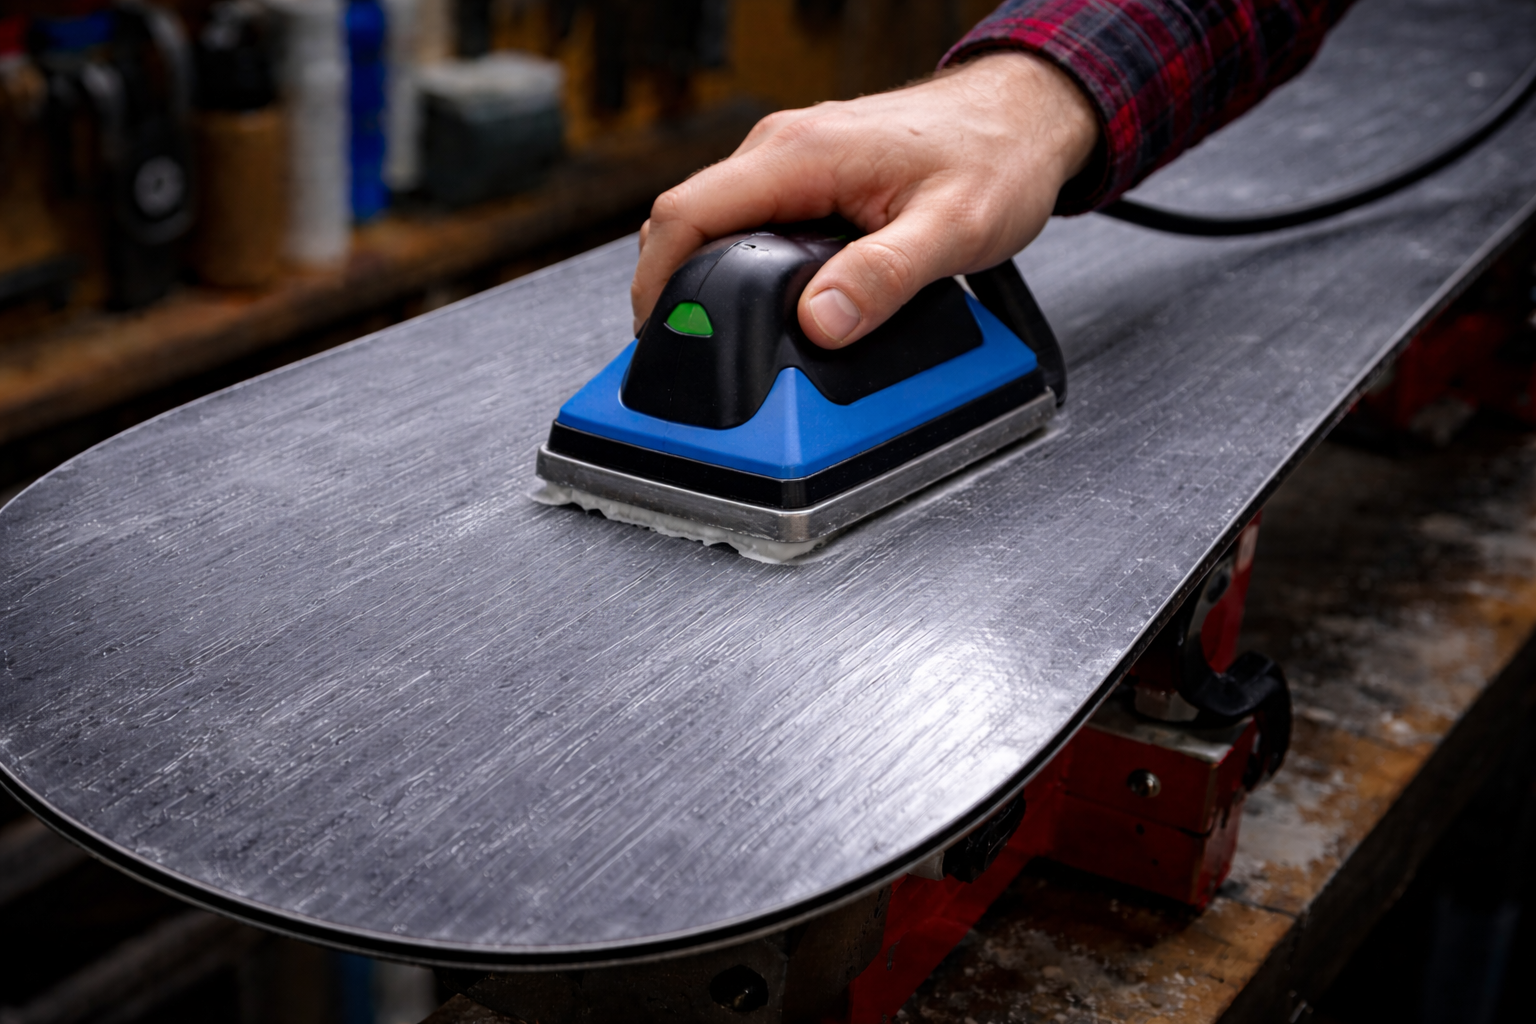
Applying Storage Wax step by step
- Heat Your Iron: Set your iron to the temperature recommended on the wax packaging.
- Drip the Wax: Hold the iron over the board and press the bar of wax against it. Let the melted wax drips onto the base. Move in a zigzag pattern from the nose to the tail.
Caution: If the wax starts to smoke, your iron is too hot, turn it down immediately - Iron it In: Place the iron on the base and move it in slow, circular motions. The goal is to spread those drips into one smooth, even layer.
Caution: Keep the iron moving at all times! if you leave it in one spot for too long, you will burn your board! - Cover the Edges: Make sure the wax spreads all the way over the metal edges. This keeps rust from forming on the edges.
- DO NOT SCRAPE: You want a thick layer of wax left on the board. This blanket of wax keeps the base fresh until opening day.
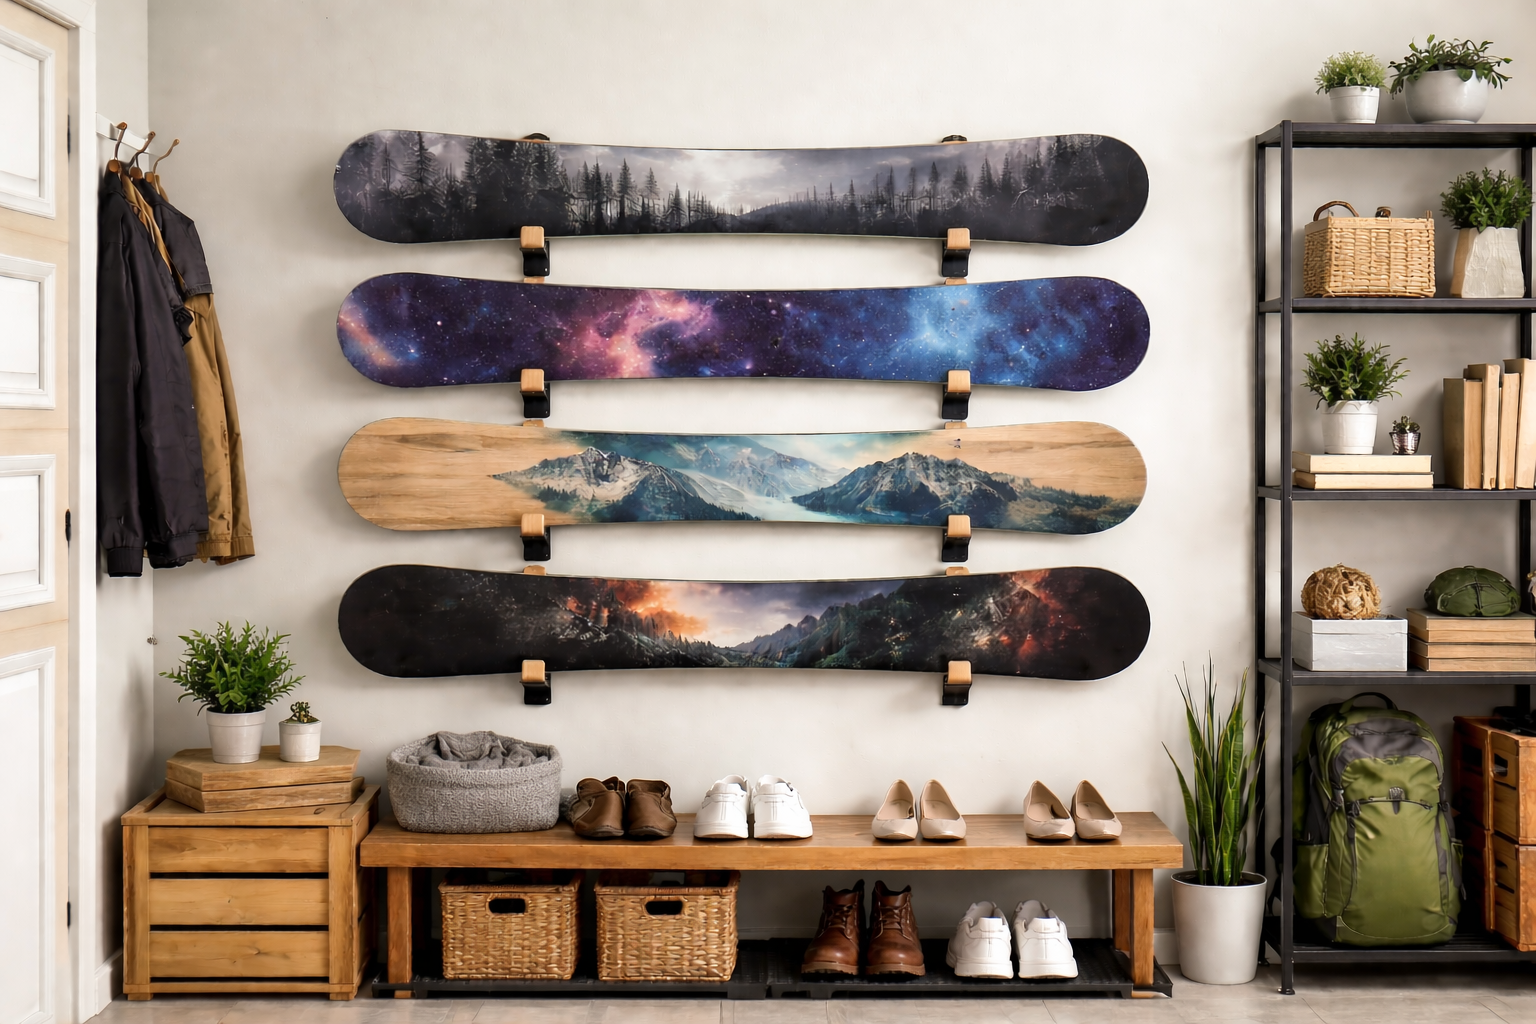
Choose the Best Place to Store a Snowboard in Summer
Finding the right spot for your board is just as important as cleaning and waxing it. If you leave your snowboard in a place that gets too hot or too damp, the materials can warp, the edges can rust, and the base can dry out—even with wax on it!
The best place to store a snowboard is inside your home in a spot that is cool, dry, and no direct sunlight, where the temperature stays the same all year.
The 3 Best Places to Store Your Snowboard at Home
- Under the Bed: This is usually the best spot if you are tight on space. It’s flat, dark, and stays at a steady temperature.
- An Interior Closet: A hallway or bedroom closet is perfect because it’s away from the sun and moisture.
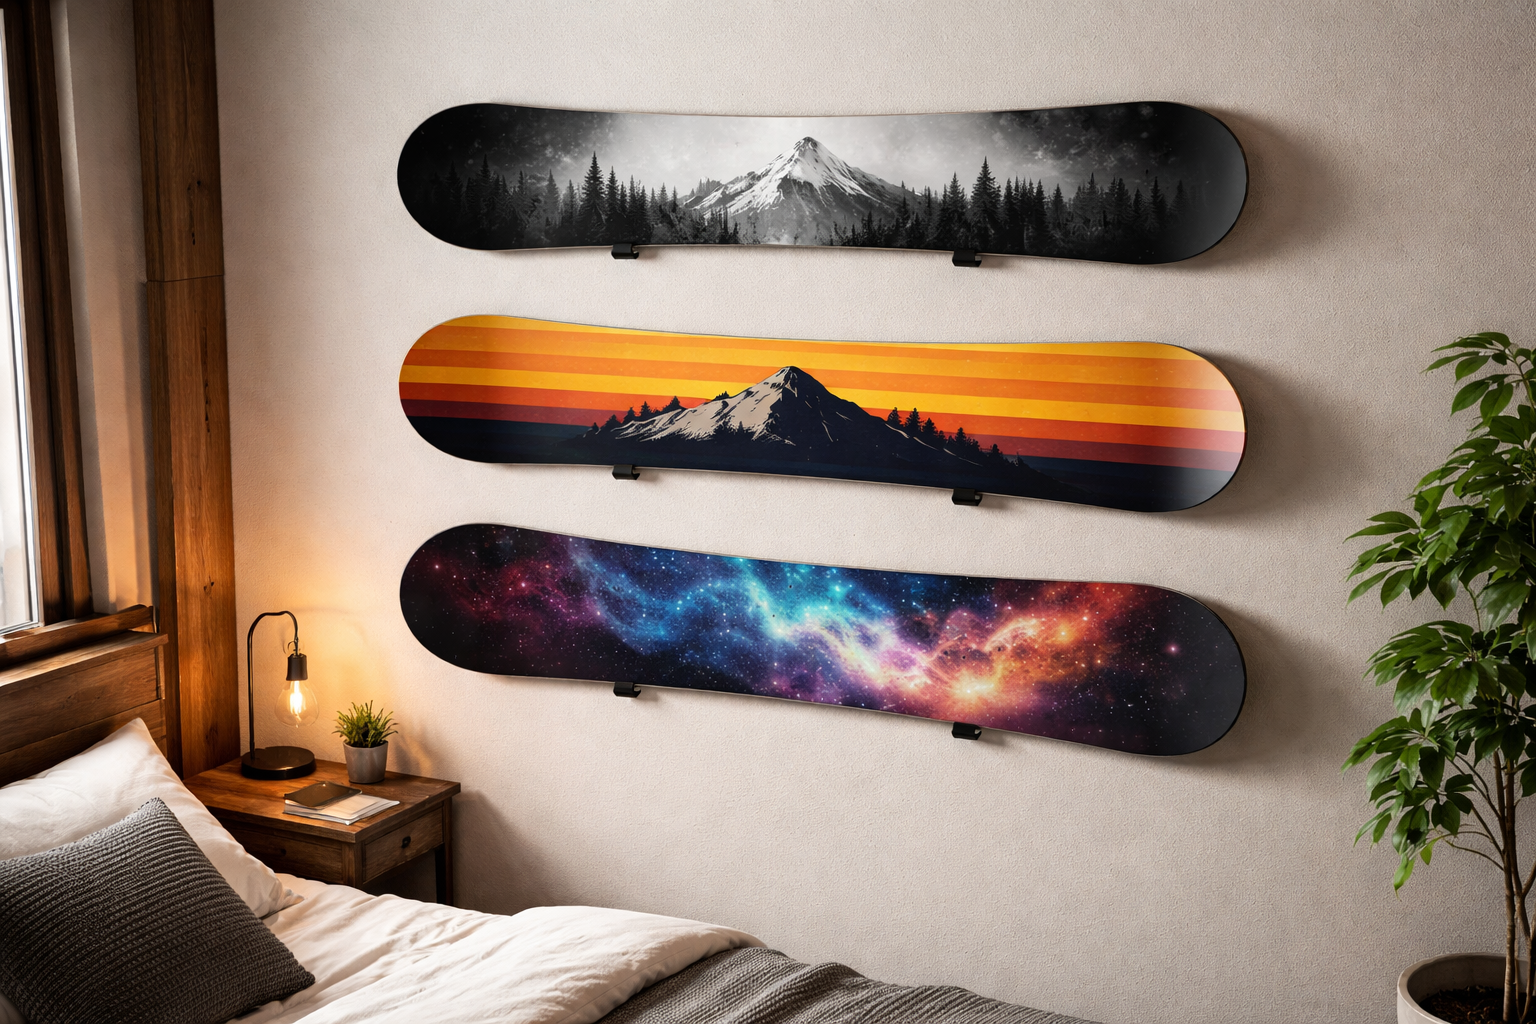
- A Gear Rack: If you have a wall rack, hanging your board horizontally in a climate-controlled room is a great way to keep it safe and show it off.
The 3 Worst Places to Avoid
- The Hot Attic: Extreme heat can actually melt your storage wax or cause the layers of your board to pull apart (delamination).
- A Damp Garage or Basement: Moisture in the air is the #1 cause of rusty edges. If the air feels “sticky” or smells musty, don’t leave your board there.
- Direct Sunlight: Never lean your board against a window. The sun’s UV rays can fade the graphics and damage the top sheet or base over time.
Storing Your Board: Vertical vs. Horizontal
Whether you store your board horizontally or vertically doesn’t actually matter, as long as the weight is spread out evenly. Personally, I like to hang my boards horizontally on a wall mount. It keeps them safe and turns my favorite gear into a cool piece of wall decor!
Get a Head Start on Your Next Season!
I know taking 20 minutes to store your snowboard properly may feel like a chore, but it will jump-start your next season. When the winter comes back around, all you’ll need to do is scrape off that storage wax and you’ll immediately be ready to hit the slopes.
Proper storage is the best way to protect your investment over the summer, but don’t stop there. Maintenance is a season-long game. To keep your edges sharp and your base fast from opening day to the spring slush, check out our DIY Snowboard Maintenance Guide for Beginners.
I’d love to hear from you: Got questions? Spotted something unclear or want to share feedback? Please reach out to me in my contact page!