How to Edge Tune a Snowboard: The Complete Beginner’s Guide
Snowboard edge tuning is the process of restoring the metal edges so they contact the snow cleanly and consistently. This usually means removing burrs, smoothing out small dents or damage, and making sure the edge angle stays even from tip to tail.
Edge tuning matters because it helps your board feel more consistent and easier to control. Over time, riding on ice, rocks, or hard snow can create small nicks, dull spots, and uneven areas. When that happens, the board may not start or hold turns as smoothly.
Edge tuning also improves grips. Sharp, even edges bite into hardpack and icy snow more effectively, giving the rider better control through the arc of a turn. When edges are dull or inconsistent, the board is more likely to skid, wash out, or feel unstable.
In this Guide, we’ll explain the base and side edge bevel, essential tools, step by step instruction on how to edge tune a snowboard, and detuning.
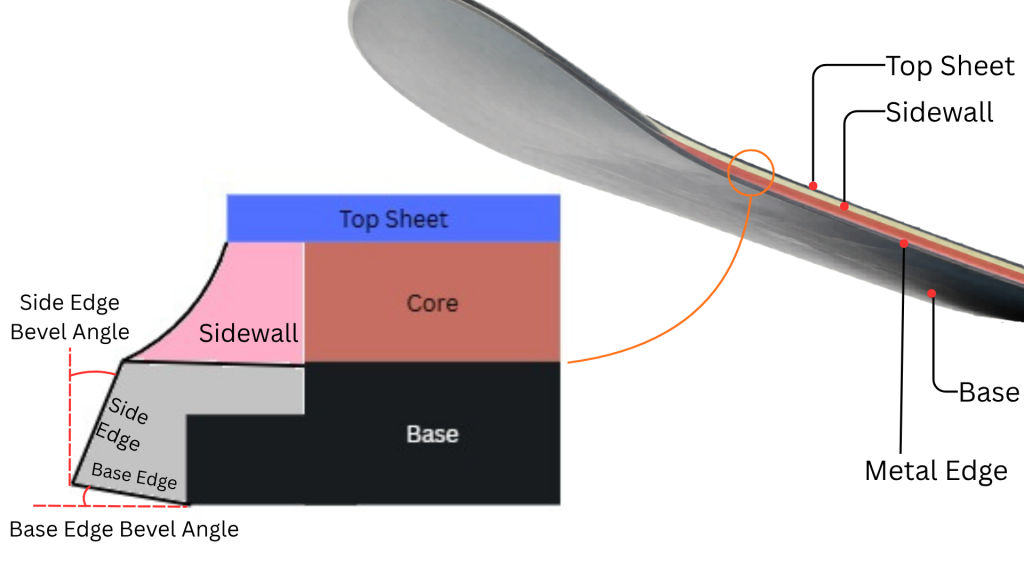
Understanding Base Edge and Side Edge Bevel
There are two key edge angles, or bevels, that strongly affect snowboard performance:
– Base edge bevel: the angle between the board’s base and the metal base edge.
– Side edge bevel: the angle between the side edge and vertical.
To better understand these angles, please refer to the diagram below. I exaggerated the thickness of the base and the bevel angles to make them easier to see. In most cases, the side bevel is typically 1° to 3°, while the base edge bevel is usually 0.5° to 1.5°.
A smaller base bevel angle means the base edge sits closer to the snow, allowing it to engage faster and making the board more responsive to your movements. However, this also makes the board less forgiving, since even a slight weight imbalance can catch the base edge unexpectedly.
A larger side bevel angle creates a sharper effective edge, allowing the metal to cut into the snow more aggressively. This improves grip and edge hold, especially on hardpack and icy snow, but this can also make the board feel more catchy.
For beginners, I recommend maintaining the default factory bevel angles to ensure a balanced and predictable ride. Burton and many other manufacturers typically use a 1° base bevel and a 1° side bevel (often referred to as an 89° side angle). To be certain, you can usually find the specific factory specs for your board model on the manufacturer’s website. In this guide, we will only tune the side edge. For base edge tuning, especially if you are new to tuning, I recommend taking your board to a professional tune shop.
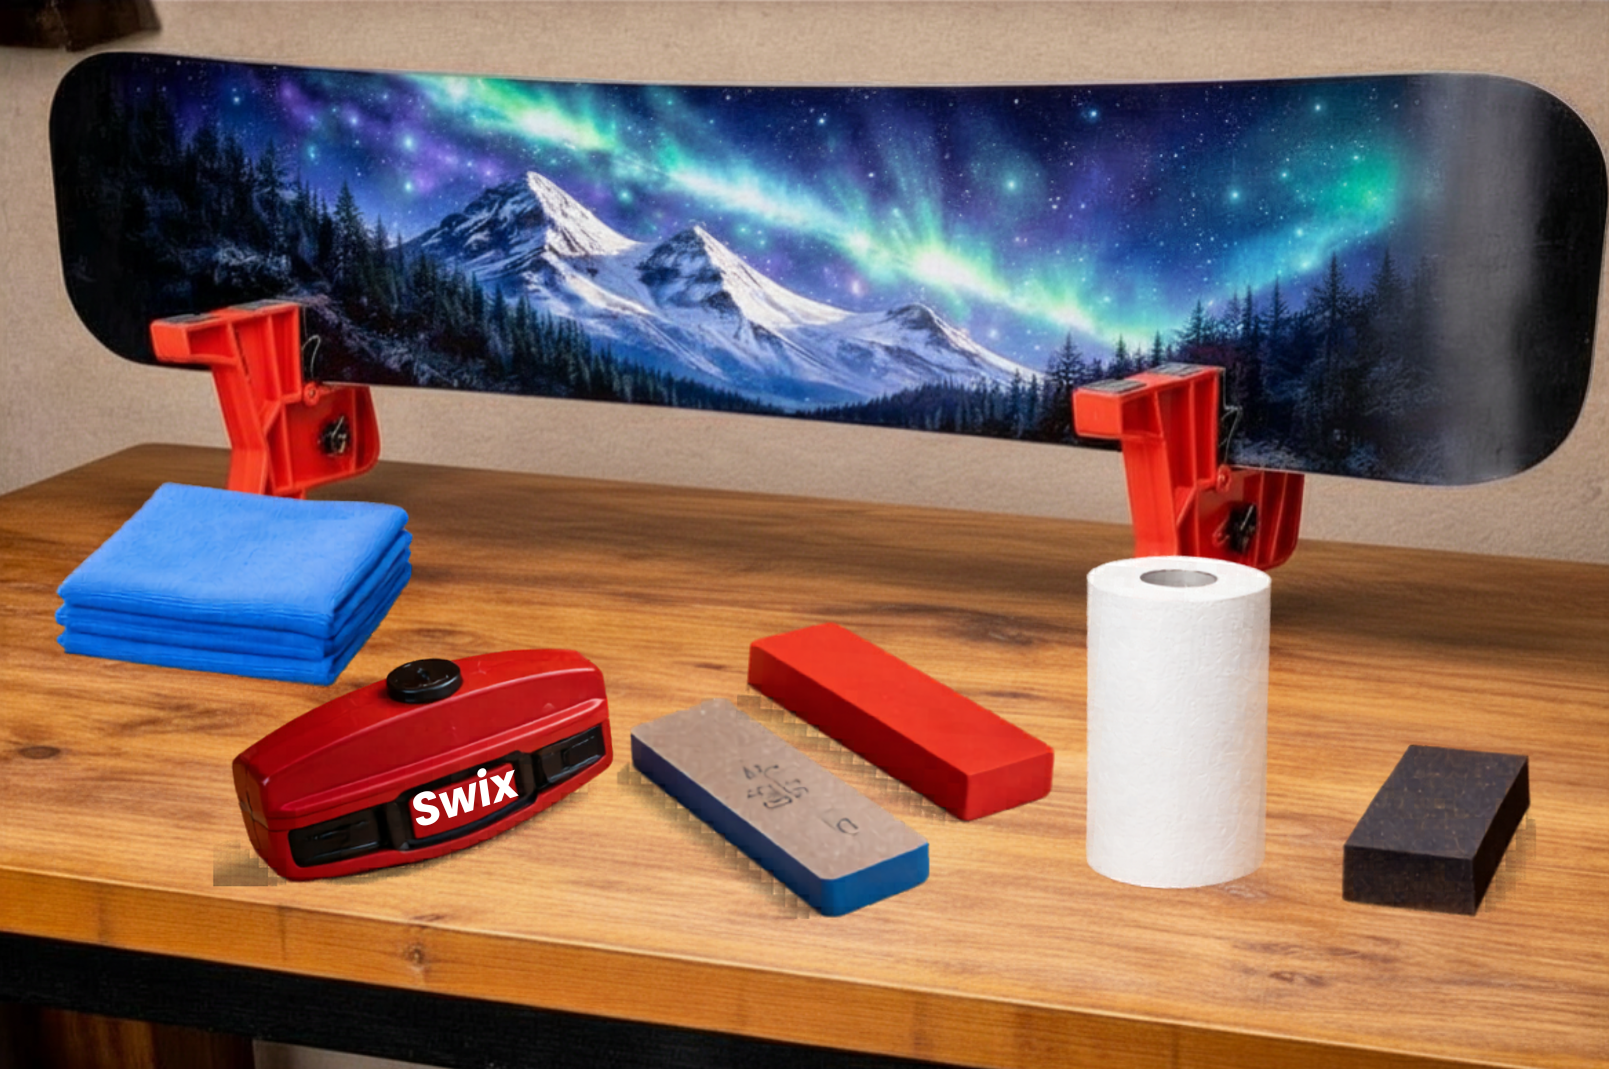
Essential Tools and Why You Need Them

- Diamond Stones come in three main grades. A lower grit number means the stone is rougher and removes more material, while a higher grit number means it is finer and used for smoothing and polishing.
- Coarse (200 grit): Use this first to grind away burrs and repair visible damage
- Medium (400 grit): Sharpens the edge and smooths out rough spots
- Fine (600 grit): polishes the edge for a cleaner finish
- Edge File Guide: Holds the diamond stone at the correct angle. Without it, it’s very difficult to maintain a consistent angle while sharpening.
- Gummy Stone: used for removing edge rust
- Microfiber Cloth or Paper Towel: cleaning the metal shavings off of snowboard edge
How to Edge Tune a snowboard: step by step guide
- Step 1: Secure the snowboard in the vises
- Step 2: Remove rust with a gummy stone
If there is any light rust on the metal edge, gently rub it off with a gummy stone. Once the rust is removed, wipe the edge clean with a cloth or paper towel. - Step 3: Wet the metal edge
Use a wet paper towel to dampen the metal edge. Make sure enough water covers the edge, since diamond stones work best when the surface is wet. The water also helps clear away metal filings and keeps the stone from clogging. - Step 4: Set up the coarse diamond stone
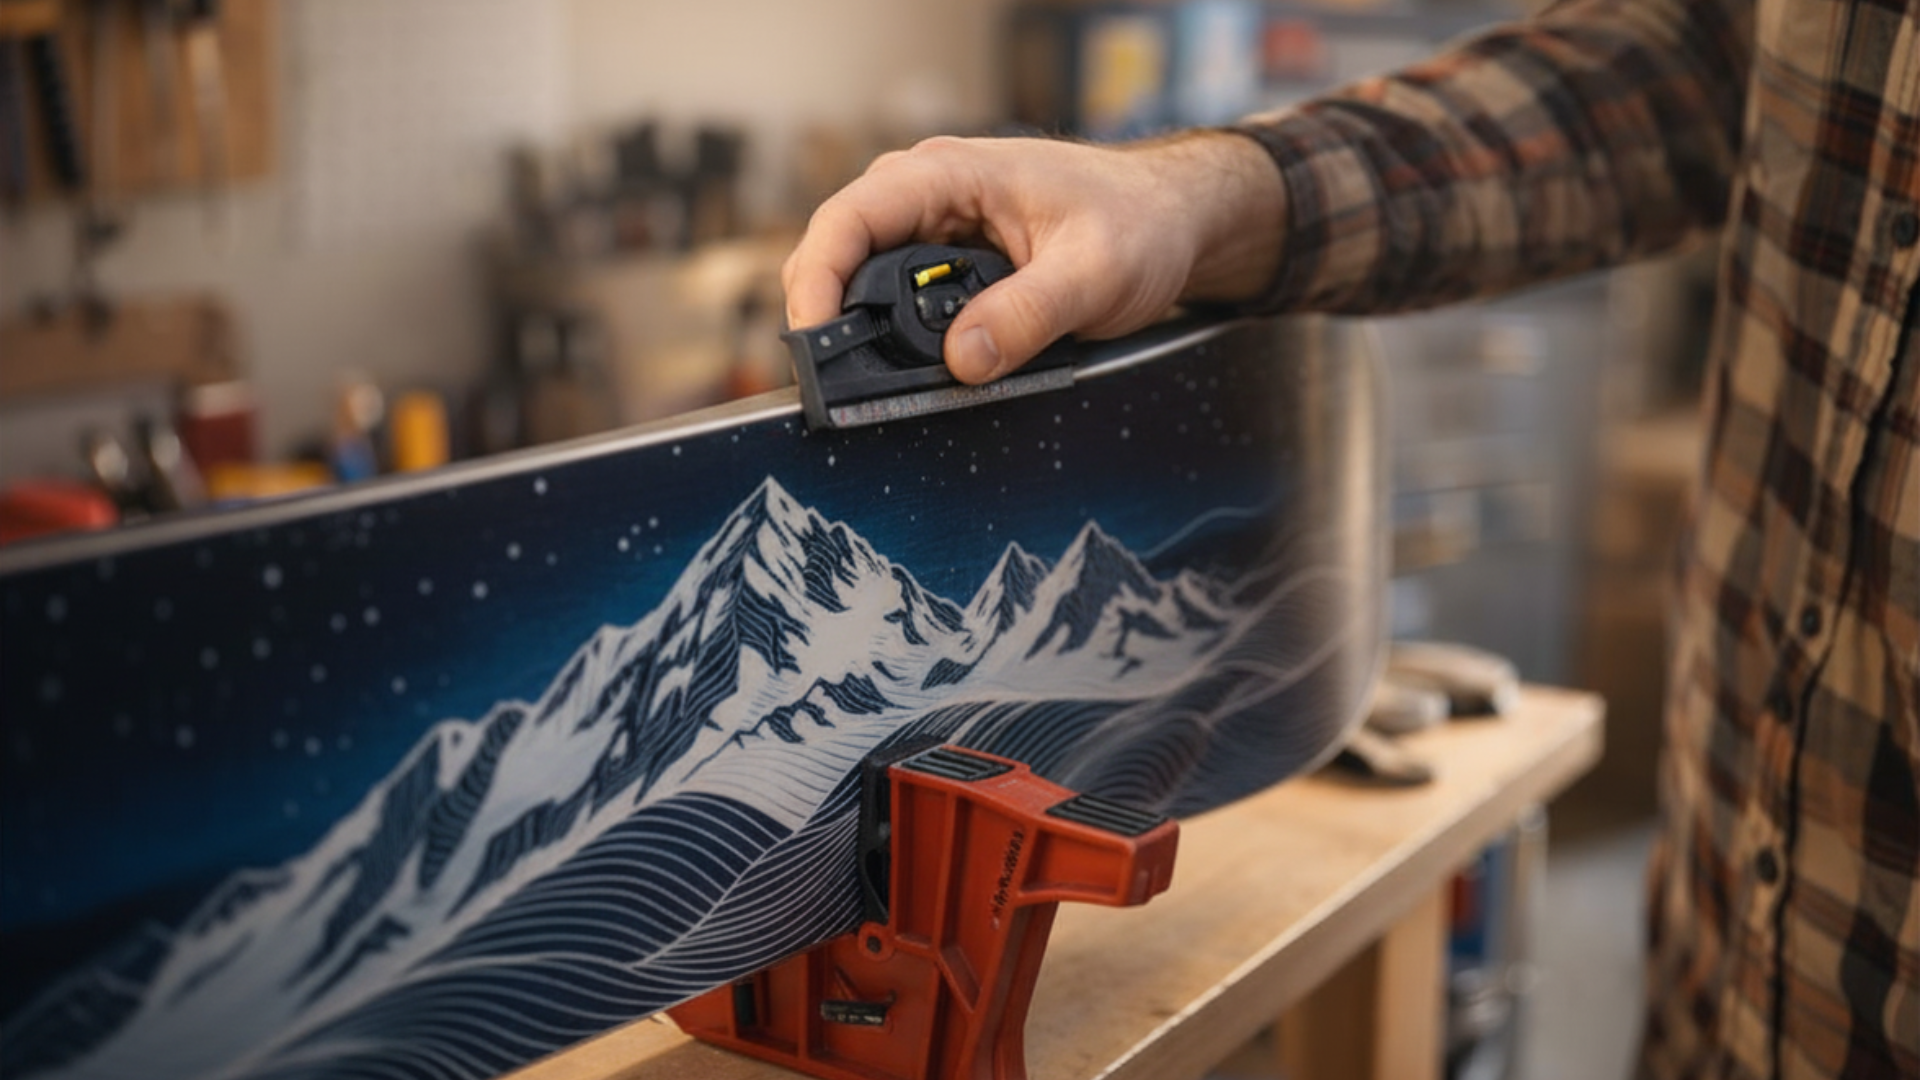
Place a coarse (200 grit) diamond stone into the edge file guide. Adjust the guide to match your snowboard’s correct side edge bevel angle. You can usually find this information on the manufacturer’s website or in the board’s tuning guide. - Step 5: Sharpen the edge with the coarse stone
Place the edge file guide against the snowboard’s side edge. Apply light, even pressure and run it smoothly from tip to tail in one direction. Make about 5 passes, then wipe away any metal shavings or residue from the edge. - Step 6: Repeat with the medium and fine stone
Switch to a 400 grit diamond stone and repeat the same process. Then repeat with a 600 grit diamond stone.
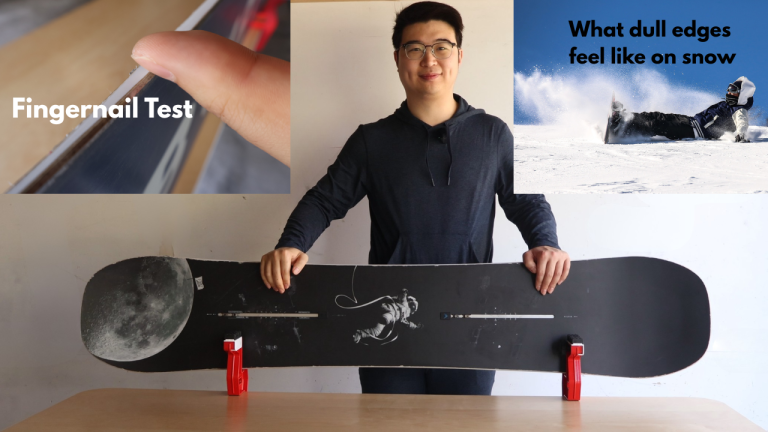
The fingernail test is a quick way to check if your snowboard edge is sharp. Lightly drag your fingernail across the edge at a slight angle. If your nail catches, the edge is sharp; if it slides smoothly, the edge is dull. - Step 7: Repeat on the other edge
Repeat Steps 3 through 6 on the snowboard’s other side edge, using the same angle and number of passes to keep both edges even. - Step 8: Wipe down and inspect the edges
When both edges are finished, wipe them clean and check that they feel smooth and consistent from tip to tail. Remove any remaining water, metal shavings, or debris.
Detuning vs. Full Sharpening: What Different Riders Need
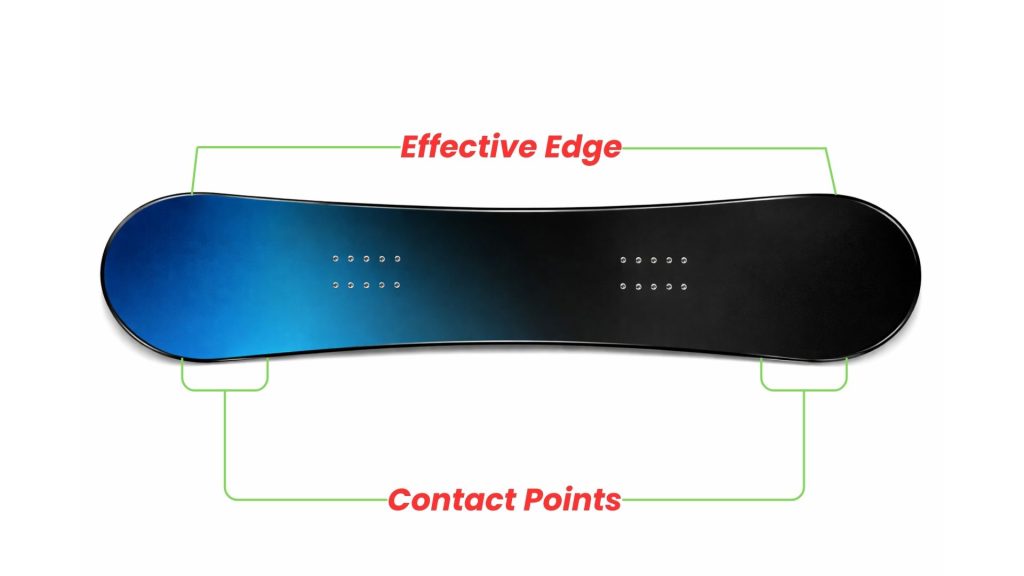
Detuning is the process of intentionally dulling parts of a snowboard’s edge, usually at the contact points or the entire effective edge. While it may seem counterintuitive to dull the edge right after you sharpened it, detuning is essential for customizing a board to a specific riding style.
For Carvers, sharp edges are important because they provide the necessary bite to grip the snow, allowing the board to hold a clean, powerful turn, especially on hardpack or ice. So carvers do not detune their board after sharpening.
All-Mountain Riders typically choose to detune only the contact points (the widest parts of the nose and tail). During a turn, the contact points engage the snow first. If they are very sharp, they can grab the snow too suddenly. By slightly dulling those areas, the board is less likely to catch an edge.
Park Riders often detune the entire effective edge because a sharp edge is a liability when riding rails. If a sharp edge bites into a steel rail, it can stop the board suddenly and cause a hard fall. By rounding the edges, park riders ensure a smooth, catch-free slide across any surface.
You’ve Got This: Your First Edge Tune is Done!
Good job! Now you know how to edge tune a snowboard! You are one step closer to becoming a pro rider!
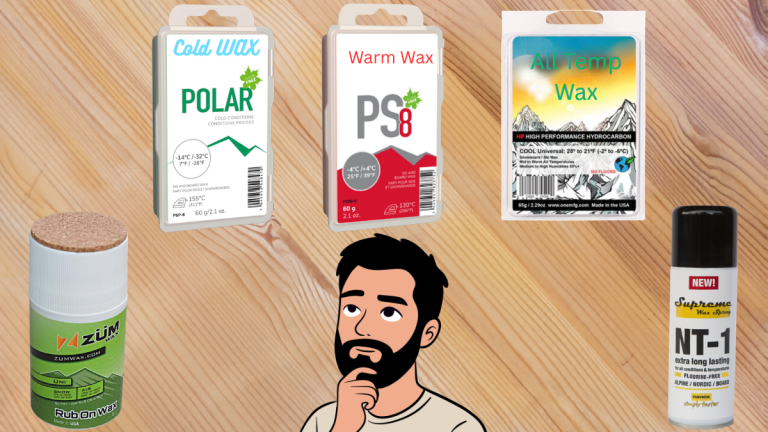
Edge tuning is just one part of keeping your snowboard in good condition and performing at its best. Other maintenance tasks, such as waxing the base, repairing small scratches, and checking for edge rust or damage, also play an important role in how the board rides. For a broader overview of snowboard care, check out our complete beginner’s guide to snowboard maintenance.
I’d love to hear from you: Got questions? Spotted something unclear or want to share feedback? Please reach out to me in my contact page!